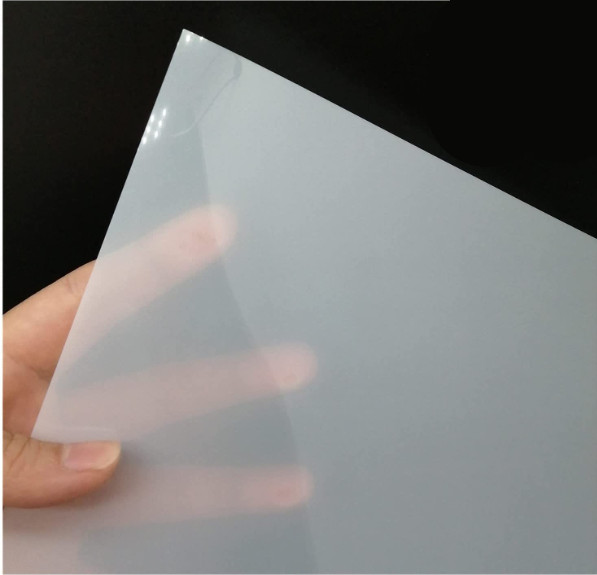
Mylar is the brand name of the DuPont Company. It describes a specific type of extruded polyethylene terephthalate (PET). It usually comes in the form of transparent sheets with some micrometer thickness. It is an excellent electrical insulator with high tensile strength and chemical stability.
Mylar often comprises thin foils; hence, less laser power is required. Twenty to thirty Watts must be plenty for cutting, even at fast speeds. However, it is able to create some fumes and smoke. Thus, good ventilation or sufficient airflow must be used.
A low-power system like a CO2 laser is an excellent choice for cutting Mylar stencils. Engraving Mylar with a laser is not common, but it is able to be done. It is essential to choose relatively thin plates of Mylar. It twists and releases bubbles if the sheet is too thick. The maximum thickness must be 1.6 mm.
Below are the steps to laser engrave and cut Mylar (extruded).
- Prepare the artwork.
- Install the laser.
- Prepare the Mylar.
- Engrave the Mylar.
- Cut the Mylar.
- Clean up the Mylar.
How to Laser Cut and Engrave Extruded Mylar?
Below are the six steps to laser cut and engrave Extruded Mylar.
- Prepare the artwork. Create the Mylar artwork with Adobe Illustrator. Use vector drawings and adjust the line width and colors to match the engraving or cutting requirements.
- Install the laser. Check that the laser is calibrated correctly and the focus is set to the height for the Mylar thickness. The laser power and speed parameters must be adjusted to achieve the required engraving or cutting depth.
- Prepare the Mylar. Trim the Mylar sheet to the required size and fix it using masking tape or other glue to the laser bed. Check that the Mylar is flat and clear of creases and bubbles.
- Engrave the Mylar. Import the created artwork into the laser program and configure the engraving settings. Launch the laser and let it etch the Mylar as desired. Remove the Mylar sheet from the laser bed after the engraving is finished.
- Cut the Mylar. Put the created artwork into the laser program and configure the cutting settings. Return the Mylar sheet to the laser bed and fasten it. Start the laser and let it cut the Mylar as desired. Remove the Mylar sheet from the laser bed after the cutting is finished.
- Clean up the Mylar. Remove any masking tape or adhesive residue from the Mylar sheet and clean it off. The engraved and cut regions should be clean and debris-free.
How to Laser Cut and Engrave Cast Mylar?
Listed below are the six steps to laser cut and engrave Cast Mylar.
- Assemble the artwork. Using graphic design tools such as Adobe Illustrator, create the artwork that wishes to engrave or cut into the cast Mylar. Use vector drawings and adjust the line width and colors to match the engraving or cutting requirements.
- Set up the laser. Ensure the laser is calibrated correctly and the focus is set to the right height for the thickness of the cast Mylar. Change the laser’s power and speed to get the desired engraving or cutting depth.
- Arrange the cast Mylar. Prepare the cast Mylar by cutting the sheet of cast Mylar to the desired size and sticking it to the laser bed with masking tape or another glue. Make sure the Mylar is flat, and there are no bubbles or wrinkles in it.
- Engrave the cast Mylar. Cast Mylar must be engraved by loading the ready-made artwork into the laser program and setting the engraving settings. Start the laser and let it carve the design into the cast Mylar. Take the cast Mylar sheet off the laser bed when the engraving is done.
- Cut the cast Mylar. Put the prepared art into the laser program, then adjust the cutting settings. Put the sheet of cast Mylar back on the laser bed and tie it down. Start the laser and let it cut the cast Mylar to the design. Take the sheet of cast Mylar off the laser bed once the cutting is done.
- Clean up the cast Mylar. The cast Mylar must be cleaned by removing any remaining glue or masking tape. The engraved and cut areas must be clean and free of dirt and dust.
What are the differences between General Part and Presentation Part Cutting for Mylar?
There are two different kinds of Mylar pieces. The first are general portions, while the second is the presentation parts. The first is very often stencils, which are used for artistic purposes. The second is usually printed circuit boards (PCBs) or masks for electronics. Stencils do not have to be as precise as PCBs to look good. On the other hand, electronic masks have to be as precise as possible. Thus, stencils are able to be cut faster and still look nice. This is despite the fact that the foils are thicker in this case. The Mylar sheets used for electronic circuit masks are usually much thinner. Therefore, they are able to be cut with lower laser power.
What speed is better for Mylar with Presentation Parts?
The laser-cutting speed is going to depend strongly on the thickness of the Mylar. For example, a 0.3 mm thick Mylar foil is able to be cut with about 200 mm/min. The thicker the Mylar, the lower the cutting speed must be. A CO2 laser cutter must be employed. It is not advisable to use a speed that is too low. The Mylar is going to fold, curl, or create bubbles if the speed is too slow. One must do a test to identify the ideal settings for a particular sheet of Mylar. The test run must be conducted on a piece of Mylar, similar to the one that must ultimately be cut.
What power is better for Mylar with General Parts?
The best power range for cutting or engraving Mylar general parts is 20-30 Watts for a CO2 laser. The Mylar is going to curl, melt, or even burn if the power is too high. The best strategy is to test the power on a piece of Mylar before starting the laser-cutting process. This is because the thickness of the Mylar foil has an enormous influence on the maximum cutting or engraving power.
How does Mylar Sheet Thickness affect laser cutter watt need?
Laser power determines how deep the laser beam is able to cut through the material. Therefore, the thicker the sheet, the higher the cutting power needed. However, it’s a good idea to experiment with the power settings before cutting Mylar panels to ensure the power isn’t too high. Using too much power is going to burn the material poorly. This creates irritating or toxic gases that damage the cutting edge.
What is the best setting for Laser-cutting Mylar?
The laser power must be around 20-30W for cutting Mylar. The exact laser speed is about 200 mm/min for 0.3 mm. These settings give good cutting results at reasonable speeds. Auxiliary airflow must be used to prevent the curling of the Mylar.
What are the common mistakes for Laser-cutting Mylar?
Listed below are the common mistakes for Laser-cutting Mylar.
- Using incorrect laser settings: The laser power and speed settings must be tuned for the Mylar thickness and desired cutting depth. Mylar is able to melt, distort, or become discolored if the laser intensity is too high or the pace is too slow. The Mylar is not able to cut cleanly or entirely if the power is too low or the speed is too fast.
- Incorrect focus: The laser beam’s focus must be adjusted appropriately for the thickness of the Mylar. The Mylar is not able to cut cleanly, or the edges are able to be warped if the focus is too high or too low.
- Poor material preparation: The Mylar sheet must be clean and free of creases or bubbles. Mylar is able to move during cutting if it is not securely fastened on the laser bed, producing cuts of inferior quality.
- Using the wrong type of Mylar: Not all Mylar kinds are acceptable for laser cutting. For instance, metalized Mylar or Mylar with a protective layer is not able to be cut neatly and may emit toxic gases when subjected to the laser beam.
- Cutting too many times in the same area: Several lasers passes in the exact location are able to raise the temperature and deform, melt, or discolor the Mylar.
- Not testing the laser settings: Testing them on a tiny piece of Mylar before cutting or engraving a more significant project is critical. It assists in identifying any possible problems with the settings and ensuring that the outcome reaches the intended quality.
What are the beginner tips for Laser Engraving Mylar?
Listed below are the beginner tips for laser engraving Mylar.
- Test the settings: It is crucial to test the laser settings on a tiny piece of the same material before engraving the final design on the Mylar. One is able to use this to modify the laser’s strength, speed, and focus until one gets the required result without causing any harm to the finished product.
- Use vector graphics: One must use vector graphics rather than raster pictures when constructing the design. Raster pictures are able to result in jagged edges and fuzzy details, whereas vector drawings provide smooth and clean engraving.
- Use a protective mask: Apply a protective mask to the surface before engraving to prevent scratching or other damage to the Mylar during the process. Moreover, it assists in keeping smoke and other particles from adhering to the Mylar.
- Consider the thickness of the Mylar: The quality of the engraving is able to be impacted by the Mylar’s thickness, so keep that in mind. More laser passes are necessary to cut through thicker Mylar to get the required result; it generates more heat and harms the material.
- Keep the workspace clean: Laser engraving generates smoke and debris. Therefore, it’s crucial to maintain a clean, well-ventilated work area. It is going to make it less likely that smoke and debris are going to build up and provide a fire risk.
- Do not rush the process: Using a laser to engrave Mylar requires time, and rushing it results in errors or inconsistent results. Take time and do what the laser settings and instructions indicate for the best results.
Which Laser Cutter is best for Mylar?
The best laser cutter for Mylar sheets is a CO2 laser. This is because Mylar is transparent to many of the visible laser wavelengths. CO2 lasers emit infrared radiation, which is very suitable for cutting or engraving Mylar. Beginners are able to check out the LS-1416 or the LS-1630 laser systems from BossLaser. More advanced or industrial users are going to find the LS-2440 series appealing.
The best laser cutter for Mylar will rely on the particular demands and specifications of the project. There are several Laser Cutter Types on the market. However, some basic recommendations for laser cutters that work well for cutting Mylar include CO2 Laser Cutters, Fiber Laser Cutters, and UV Laser Cutters.
Generally, CO2 laser cutters are often used for Mylar because of their cost, accuracy, and ability to cut through thin materials. Nevertheless, it’s crucial to get advice from a specialist or the manufacturer’s best practices recommendations before selecting a laser cutter for Mylar since the precise requirements are able to change based on the thickness and other characteristics of the material being cut.
What are the Mylar Projects for Laser-cutting?
Listed below are the Mylar Projects for laser-cutting.
- Stencils: Cut Mylar sheets using a laser to make personalized stencils for painting or airbrushing.
- Jewelry: Use Mylar sheets to cut elaborate patterns to make one-of-a-kind earrings, necklaces, and bracelets.
- Ornaments: Create dazzling ornaments or decorations by laser-cutting Mylar into the appropriate shapes.
- Scrapbooking: Create unique journal covers and scrapbook page decorations by using a laser cutter to cut out bespoke shapes and patterns.
- Signage: Create personalized signage for companies or events by laser-cutting lettering and shapes from Mylar sheets.
- Card making: Make unique cards with laser-cut Mylar graphics for birthdays, weddings, or other significant events.
- Lampshades: Create distinctive lampshades that produce eye-catching shadows by cutting elaborate designs from Mylar sheets.
- Decorative accents: Employ laser-cut Mylar shapes to make decorative accents for home design projects like flower arrangements or wall art.
- Stained glass: Laser-cut Mylar sheets are able to be arranged in a frame or window to provide the appearance of stained glass.
- 3D printing: Laser-cutting and 3D printing Mylar sheets are able to be used as a printing surface for 3D models or as a mold for resin or other casting materials.
What plastic is the best for laser-cutting?
Listed below are the plastics that are the best for laser-cutting.
- Acrylic: It is a famous laser cutting material owing to its transparency, simplicity of usage, and a large selection of colors. It is readily engraved, making it an excellent choice for signs and exhibitions.
- ABS: It is a thermoplastic polymer recognized for its toughness, impact resilience, and tolerance to high temperatures. It is often used to create prototypes and machine components.
- Polypropylene: it is lightweight and resilient, making it a popular option for packing materials as well as laser cutting tasks that need flexibility.
- Polycarbonate: It is a durable, clear plastic that is impact and heat-resistant, making it an excellent choice for applications such as safety shields and machine guards.
- PVC: It is simple to work with and is often used to make signs, displays, packaging, and containers.
What are the alternatives of Mylar for Laser-cutting?
Listed below are the alternatives of Mylar for Laser-cutting.
- Polymide Film: Polyimide film is a viable substitute for Mylar for laser cutting electronic components, also known as Kapton film. It is often used in high-temperature applications.Polymide Film Engraving entails vaporizing the material with a strong laser beam to create an exact and long-lasting imprint. The laser is able to be set up to follow a predetermined pattern, making it possible to engrave objects with very fine details.
- Polyethylene Terephthalate (PET): This substance resembles Mylar and is often used as a replacement in laser cutting applications. Polyethylene Terephthalate (PET) engraving includes heating the surface of the material with a high-powered laser beam, causing it to evaporate and leaving a permanent imprint. The laser is able to be set up to follow a predetermined pattern, making it possible to engrave objects with very fine details.
- Polyvinyl Chloride (PVC): It is often used to laser cut stencils and make signs and displays. Polyvinyl Chloride (PVC) engraving involves utilizing a high-powered laser beam to heat and melts the material’s surface, causing it to evaporate and leaving a permanent imprint. The laser is able to be set up to follow a predetermined pattern, making it possible to engrave objects with very fine details.
- Polycarbonate Film: The hardness and flexibility of polycarbonate film make it an excellent material for laser cutting applications that call for high temperatures and durability. Polycarbonate film engraving involves heating the material’s surface with a strong laser beam so that it vaporizes and leaves a lasting imprint. The laser is able to be set up to follow a predetermined pattern, making it possible to engrave objects with very fine details.
- Acetate Film: This material, readily cut with a laser, is often used to make stencils. Acetate film engraving involves heating the surface of the material with a high-powered laser beam, causing it to evaporate and produce a permanent imprint. The laser is able to be set up to follow a predetermined pattern, making it possible to engrave objects with very fine details.
Is it hard to create a stencil with laser-cutting?
No, creating a stencil with a laser cutter is much easier and more accurate than with a knife. The laser cutter is much faster and is able to have a sub-millimeter precision. However, making some test runs first on a dummy sheet of Mylar to find out the best settings for the process is advisable.
A laser cutting device is used to make a specific kind of stencil called a laser stencil. It employs a powerful laser beam to precisely cut polymers, metals, and textiles. Laser cutters are able to generate stencils with elaborate and accurate patterns that is able to be hard to obtain with other means.
Screen printing, airbrushing, and painting require laser stencils. Paint or ink is put via stencil apertures to produce the desired design. Laser stencils are able to be constructed from Mylar, vinyl, or cardboard, depending on the job.
Laser stencils are able to create intricate, clean-lined patterns. They are perfect for mass-producing stencils since they are easy to copy. Laser stencil needs specialized equipment and knowledge, making them impractical for minor or one-off jobs.
What materials can be used for laser-cutting stencils?
The best material for making stencils with a laser cutter is Mylar. However, one is able to use practically any type of rigid material. Lasers are able to cut stencils from paper, wood, plastics, or even metals.
What is the difference between laser-cutting with a stencil and without one?
Laser cutting is able to be done with or without a stencil, depending on the application and intended output. Listed below are some key differences between laser cutting with and without a stencil.
- Precision: Employing a stencil improves laser cutting precision because the stencil guides the laser beam. The operator must manually direct the laser beam without a stencil, which results in less accurate cuts.
- Efficiency: Utilizing a stencil is able to boost efficiency in the laser cutting process since the stencil is able to be used again to make similar cuts. Each cut must be done separately without a stencil, which may be time-consuming and inefficient.
- Flexibility: Laser cutting without a stencil provides more design freedom and more complicated shapes and cuts that are not able to be achievable with a stencil. Nonetheless, higher expertise and accuracy on the side of the operator are required.
- Cleanliness: Laser cutting using a stencil assists in decreasing debris and waste material by acting as a barrier to prevent extra material from being cut. Without a stencil, the cutting process is able to create additional debris and waste.
- Cost: The cost of laser cutting using a stencil is able to be greater since the stencil must be made or acquired before the cutting process is able to begin. However, improved accuracy and efficiency are able to save time and money in the long term.
Laser cutting with or without a stencil has benefits and drawbacks, and the project’s demands and requirements are going to determine the option. One advantage of using stencils is their consistency. A stencil creates a consistent design that is able to be replicated with the same degree of precision and detail again and over. This is especially beneficial in large production and industrial operations where uniformity is critical. On the other hand, one disadvantage of using stencils is their limited design flexibility. The flexibility of the overall design is able to be hampered by the fact that stencils are created to replicate a certain pattern or design. A new stencil needs to be made in order to make modifications to the design, which is able to be time-consuming and expensive.