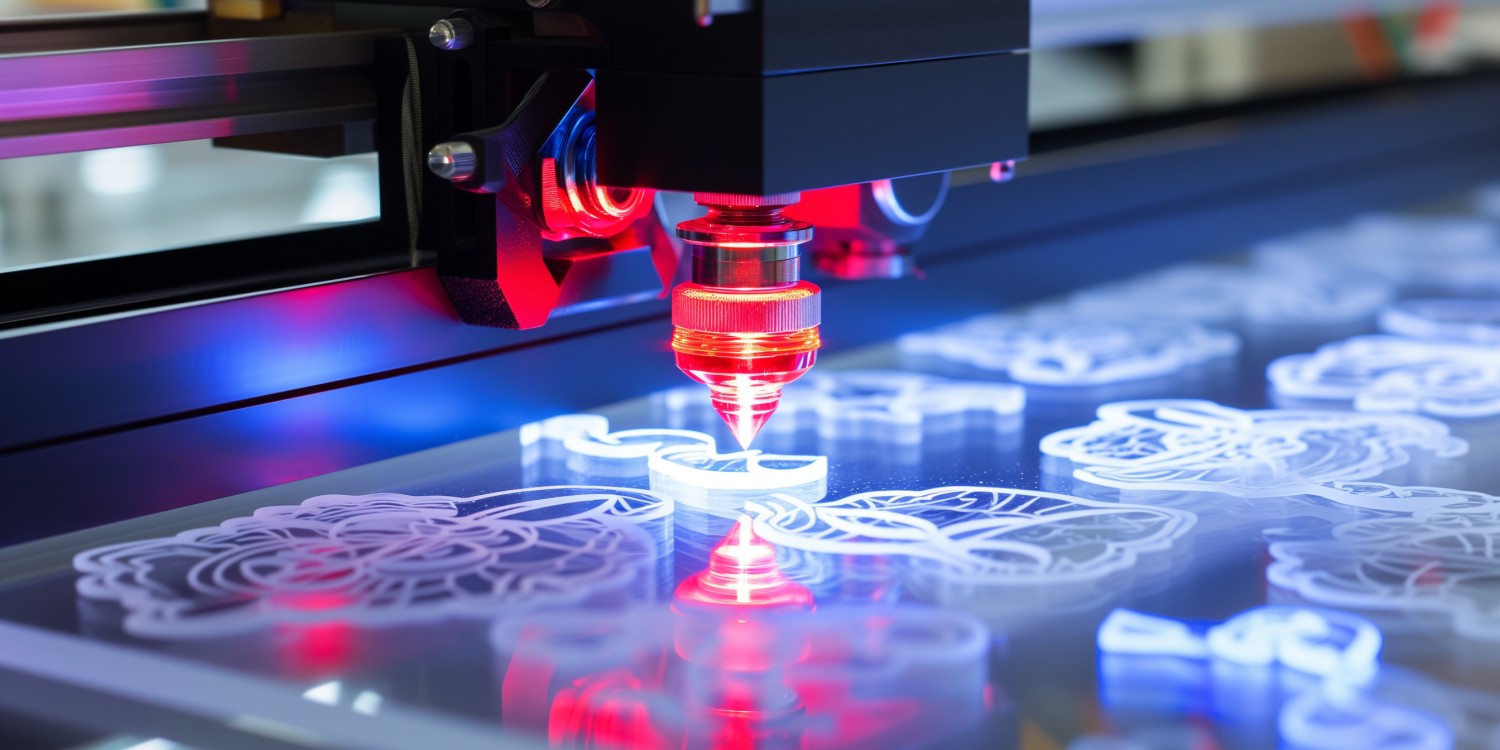
Laser cutting is a highly sophisticated method of cutting materials very precisely. Another option is laser engraving, which uses quite similar equipment. Both methods are based on CAD files, which contain the outline of the shapes that have to be cut. A powerful laser system then cuts or engraves the desired patterns. It does that by melting or vaporizing the workpiece material. One particularly interesting material for laser cutting, or engraving, is acrylic. Most commonly, this polymer comes in acrylic sheets, such as Plexiglas. However, acrylic is usually used to describe a whole class of materials rather than just Plexiglas.
The most popular lasers for cutting or engraving acrylic are CO2 lasers. They usually have output powers between some dozen to some hundred watts. The choice of output power depends on the thickness of the acrylic. The speed of such laser systems starts at around one mm/s and is able to go up to several cm/s. How fast the laser power and the thickness of the workpiece determine the process. The higher the output power of the laser, the faster it is able to cut or engrave. The focal length of the laser is able to be freely chosen, but for most applications, it is going to be several cm. For some purposes, the acrylic is going to have to be cooled during processing. This is commonly done with suitable airflow. The flow itself has to be adjusted in accordance with the laser power and the material properties.
Below are the six steps on how to laser cut or engrave acrylic.
- Choose suitable acrylic. There are two types: cast and extruded acrylic. The former is better suited for laser cutting/engraving.
- Choose the right laser power – about 30 W for cutting and 4-6 W for engraving.
- Focus the laser beam onto the surface.
- Choose the right laser speed – about 6.5 mm/s for 8 mm thickness and 13 mm/s for 4 mm thickness.
- Work with low to medium airflow – too much flow, and the acrylic is not going to melt sufficiently.
- Ensure that the airflow covers the whole area of the acrylic plate.
How to Laser Cut and Engrave Extruded Acrylic?
Listed below are the steps to laser cut and engrave extruded acrylic.
- Prepare the acrylic sheet. Ensure the acrylic sheet is clean and clear of any dirt or debris before cutting or engraving. The acrylic surface is able to be cleaned with mild soap and water, and any remaining moisture is able to be wiped away with a dry, lint-free cloth.
- Set up the laser cutter. Change the power, speed, and focus settings on corresponding to the thickness and kind of acrylic being used. The settings for the laser cutter are able to differ based on the brand and model.
- Positioning the acrylic sheet. Secure the acrylic sheet to the laser cutter bed using clamps or tape to prevent it from shifting during cutting or engraving.
- Start cutting or engraving. Use the laser cutter to cut the required shapes or patterns from the acrylic sheet or to engrave the desired pattern or text into the surface. Slide the laser cutter head gently and steadily over the acrylic sheet to produce a clean, accurate cut or engraving.
- Remove the acrylic sheet. The acrylic sheet must be carefully removed from the laser cutter bed when the engraving or cutting is finished. Dust or debris that is able to have been collected during the cutting or engraving process must be removed using a clean, dry cloth.
How to Laser Cut and Engrave Cast Acrylic?
Listed below are the methods to laser cut and engrave cast acrylic.
- Ensure the acrylic sheet is clean and clear of dirt or debris before cutting or engraving. The acrylic surface is able to be cleaned with mild soap and water, and any remaining moisture can be wiped away with a dry, lint-free cloth.
- Set the laser cutter’s power, speed, and focus parameters to the proper acrylic thickness and type values. For instance, the Pin Table used by Epilog’s laser cutting equipment helps lessen the laser’s reflection and prevents scratches on the acrylic’s bottom. Moreover, the Pin Table’s improved ventilation during cutting and engraving helps to lower heat buildup and avoid warping or charring.
- Attach the acrylic sheet to the laser cutter bed with clamps or tape to keep it in place throughout the engraving or cutting process.
- Start cutting or engraving. Use the laser cutter to cut the required shapes or patterns from the acrylic sheet or to engrave the desired pattern or text into the surface. Slide the laser cutter head gently and steadily over the acrylic sheet to produce a clean, accurate cut or engraving. Avoid moving the laser cutter head too rapidly or using too much power since doing so is able to deform or melt the acrylic.
- Remove the acrylic sheet from the laser cutter platform once the cutting or engraving is complete. Dust or debris that is able to have been collected during the cutting or engraving process must be removed using a clean, dry cloth.
What are the differences between the General Part and Presentation Part Cutting for Acrylic?
Most acrylic parts that are laser cut are either general or presentation parts. General parts do not have any particular requirements. Hence, they are able to be cut quite fast and with high laser power. It allows for very rapid manufacturing. Note that acrylic does not need much airflow for good cutting results. However, don’t turn off the airflow entirely because the acrylic vapors are able to cover the laser optics.
Presentation parts, on the other hand, have neat edges that look polished. Extruded acrylic must be used for this purpose. The laser cutter must run with high power and low speed. It is advisable to use a lens with a considerable focal length. A long focal length leads to bigger laser beam diameters. This reduces the temperature at the beam edge. Hence, the acrylic is going to melt than evaporate, creating nice-looking cutting edges instead.
What speed is better for the Acrylic Laser Cutting of Presentation Parts?
Utilizing extruded acrylic over cast acrylic for laser cutting acrylic display pieces is preferable. The cutting speed for this type of part must be lower than for general parts. Lower speed is going to cause the acrylic to melt at the edges and form a glassy surface. It has a very nice effect on the appearance of the parts. The range of speeds for cutting presentation parts strongly depends on the acrylic’s thickness and the laser’s power. Hence, no single value fits all purposes, but a vast number of speed-thickness tables for laser cutting are available on the internet.
What power is better for Acrylic Laser Cutting of General Parts?
General parts must be produced rapidly with low financial and time costs. Hence, the laser power must be chosen as high as possible. The high power rapidly evaporates the acrylic. Therefore, the airflow has to be reasonably high because these vapors can coat the laser lens. It decreases its functionality. However, the airflow must not be too high because too much cooling is able to diminish the cutting capability of the laser.
Which Acrylic Type is Best for Laser Cutting?
Cast acrylic is often regarded as the best for laser cutting because of its homogeneous density, which enables more accurate and reliable cuts. Cast acrylic is less likely to deform or melt during laser-cutting because it has a higher melting point than extruded acrylic.
Extruded acrylic is still able to be appropriately laser-cut. However, the cutting procedure is carefully followed if the laser settings are adjusted correctly. A small sample must constantly be tested before beginning a significant laser-cutting job since various brands and acrylic grades are able to have somewhat varied qualities.
The best acrylic type for laser cutting ultimately relies on the project’s needs and use. Acrylic for laser cutting requires careful consideration of thickness, color, transparency, and cost.
Does the type of acrylic affect the speed and power required for laser cutting?
No, the type of acrylic does not usually affect the speed and power requirements. The only exception is abrasion-resisting acrylic. This type of acrylic does not really allow laser light to penetrate it. Thus, it cannot be cut efficiently at all. Nevertheless, the thickness of the acrylic workpiece is what matters most for cutting speed and power. Another point is whether one wants to cut or engrave general or presentation parts. General parts are able to be cut faster and with higher power than presentation parts.
How does Acrylic Sheet Thickness affect laser cutter power needed?
The rule is that the thicker the sheet, the more power is required. This is because the laser beam needs to melt or evaporate more material. Hence, it needs more power to do so. The laser power is able to affect the aesthetics when cutting cast acrylic. The acrylic edges are going to be less neat if the power is too low. On the other hand, the laser cutting duration is going to most likely be longer for thicker sheets. The reason is that more material must be melted or evaporated if the sheet is thicker. It takes a little longer.
What is the best setting for Laser Cutting Acrylic?
Unfortunately, there is not one single answer to this question. The settings depend on various parameters, such as the thickness of the acrylic plate, laser power, or whether general or presentation parts must be cut. There are several power-speed charts online that are able to be used to determine the appropriate settings based on the needs.
What are the common mistakes for Laser Cutting Acrylic?
The common mistakes that must be avoided when laser cutting acrylic are listed below.
- Too high or too low laser power: The former causes heat damage, while the latter does not allow cutting through the acrylic.
- Choosing the airflow too high: This is able to lead to bad cutting results because of unwanted cooling.
- Lasers cut thick plates at high speed: The laser is able to struggle to cut through the whole component if the speed is too high. Moving the laser too fast is able to cause thermal stress damage in the material.
- Using lenses with unsuited focal length: The acrylic is going to become either excessively hot or not be cut at all if the laser optics’ focal length is off.
What are the beginner tips for Laser Engraving Acrylic Sheets (Plexiglass)?
Below are the beginner tips for Laser Engraving Acrylic Sheets (Plexiglass).
- Selecting the correct Acrylic Sheet: Seek cast acrylic sheets that are particularly suited for laser engraving. These sheets have a higher-grade surface finish and deliver better outcomes than extruded acrylic sheets.
- Prepare the artwork: Use vector-based software, such as Adobe Illustrator or CorelDRAW, to construct the design. Ensure the artwork is resized and set to the correct dimensions for the acrylic sheet.
- Change the laser settings: Begin with low-power and high-speed settings and progressively raise the power until the desired engraving depth is obtained. Experiment with various variables to discover the best mix for the unique application.
- Employ masking tape: Cover the acrylic sheet’s surface with masking tape to avoid scratches and to help stop the laser from melting the engraved area’s edges.
- Surface preparation: Thoroughly clean the acrylic sheet’s surface before engraving to get rid of any dust, oil, or other particles that are able to get in the way of the laser engraving.
- Utilize a honeycomb table: A honeycomb table is going to keep the acrylic sheet from warping and allow for improved air circulation, increasing the engraving quality.
- Test before engraving: Make sure to have the proper settings for the project before engraving the final design on a tiny piece of acrylic sheet.
- Ventilate the area: Keep the engraving area well-ventilated to avoid the accumulation of fumes and hazardous particles.
Which Laser Cutter is best for Acrylic Laser Cutting?
The best laser cutters for acrylic are CO2 lasers, but fiber or solid-state laser cutters are available. CO2 laser cutters are the most common type. They usually have an output power of 25 – 100 watts, depending on the size.
There are various aspects to consider when selecting the laser cutter types for acrylic laser cutting, including the size and thickness of the acrylic sheets, the kind of laser, the cutting speed and accuracy needed, and the budget.
Why is Plexiglass better for Acrylic Laser Cutting?
Plexiglass is a brand name for acrylic, thermoplastic material with several advantages often utilized in laser cutting applications. It is very resistant to scratches, is transparent, and has a high tensile strength. It is very durable and lightweight, which makes it a highly sophisticated material. It is able to be swiftly and precisely laser cut because of its low melting point (430 K). It produces beautiful cutting edges with a glassy appearance when using the proper laser-cutting equipment.
What are the Acrylic Projects for Laser Cutting?
There are a vast number of possible projects for acrylic laser cutting. One is able to check out these examples from Boss Laser on Youtube:
- Acrylic sign – https://www.youtube.com/watch?v=wcKnlb50Or0
- Custom phone holders – https://www.youtube.com/watch?v=0iya1FA80nU
- Acrylic design letters – https://www.youtube.com/watch?v=SrIVQvqMcCo
- Acrylic back-light LED plate – https://www.youtube.com/watch?v=yk0GRZeFbYU
- Acrylic plaque – https://www.youtube.com/watch?v=YQAg_4m55PI
- Acrylic/wooden clock – https://www.youtube.com/watch?v=v8qqEdgORr4
- Acrylic inlay artwork – https://www.youtube.com/watch?v=M-r-K1mgN-U
- Acrylic maze – https://www.youtube.com/watch?v=l3kn8XHBwTU
- Acrylic 2-D butterfly artwork – https://www.youtube.com/watch?v=sIjKIp-ihhs
- Gold-covered acrylic mirror – https://www.youtube.com/watch?v=oE9pkEuMcn0
What are the alternatives of Acrylic for Laser Cutting?
Listed below are the alternatives of Acrylic for Laser Cutting.
- Glass: It is able to be cut with a laser, but it needs much more power and generates far more heat than acrylic. The usability of glass for specific applications is able to be impacted by the fact that it is more brittle and delicate than acrylic. Glass is able to be engraved with a laser cutter, which makes clean, accurate cuts, and cuts creates complicated patterns. Nevertheless, glass engraving needs a higher laser power setting and generates more heat than other materials, raising the danger of cracking or shattering. Awards, trophies, and ornaments are often made using glass engraving.
- Polycarbonate: It is a robust, break-proof material that resembles acrylic in terms of transparency and toughness. Nevertheless, it is more costly, and cutting is able to need higher laser power settings. Engraving on polycarbonate is possible using a laser cutter. However, a more substantial laser power setting is needed than for engraving on acrylic. Polycarbonate is a better material than acrylic for situations where impact resistance is crucial since it is more robust and shatter-resistant. Polycarbonate engraving is often used to make signs, labels, and control panels.
- Plywood: It is appropriate for laser cutting and is able to create detailed shapes, and comes in various thicknesses, although cutting it needs a more robust laser. Plywood is able to be engraved with a laser engraver, producing clear, precise incisions and intricate designs. The engraving depth is able to be varied according to the thickness of the plywood. Signage, branding materials, and ornaments are often made with plywood engraving.
- MDF: Medium-Density Fiberboard or MDF is a typical laser-cutting material made of wood. It generates crisp edges, is affordable in comparison, and is simple to cut. It is less transparent and less resilient than acrylic, however. A laser cutter, which creates precise, accurate cuts and is able to produce detailed patterns, engraves MDF (Medium-Density Fiberboard). The engraving depth may be varied depending on the thickness of the MDF. Signage, branding materials, and ornamental objects are often made with MDF engraving.
- Foam: Polystyrene or polyurethane foam, in particular, is able to be laser-cut to produce three-dimensional items or packaging materials. Nevertheless, cutting foam materials with a laser is able to emit fumes and needs extra ventilation. A laser cutter is able to make three-dimensional items or intricate artwork by engraving foam materials like polystyrene or polyurethane foam. Nevertheless, cutting foam materials with a laser is able to emit fumes and needs extra ventilation. Sculptures, display items, and packaging are often made using foam engraving.