Cork is a natural material that is made from the bark of cork oak. It is used for many purposes. For example, it is able to be applied for sealing wine or Champaign bottles, or to make handbags, or wallets. Laser-cutting cork generates very fancy-looking items for design and decoration purposes. Cork has excellent contrast and is therefore perfectly suited for laser cutting or engraving. The best laser system for cork is a CO2 laser such as the LS series from Boss Laser.
The optimum power, speed, focal length, and airflow level are strongly dependent on the thickness of the cork plate that must be cut or engraved. Cork is able to be cut or engraved with relatively minimal input power because of its great contrast.
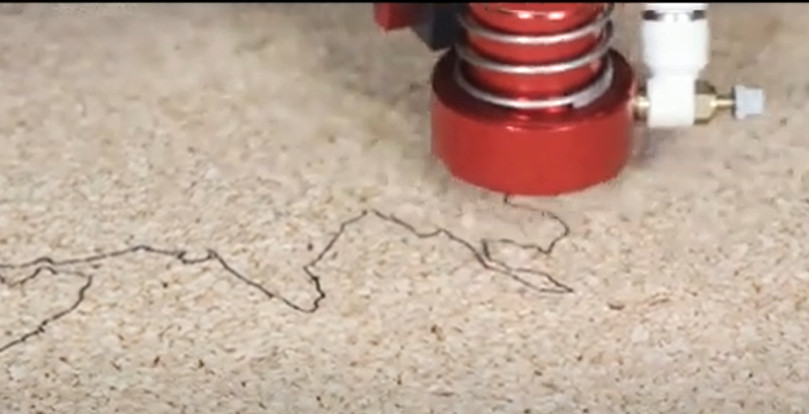
Here is what must be done to get the best results:
- The resolution of the file must be at least 400 dpi.
- Choose the right laser power – about 40-50 W for cutting and 4-7 W for engraving must be sufficient for cork up to 3 mm thickness.
- Focus the laser beam onto the surface to create a brown-colored engraving. If the beam is a bit out of focus the lines are going to get darker.
- Choose the right laser speed – about 20 mm/s.
- Work with sufficient airflow
How to Laser Cut and Engrave Extruded Cork?
Listed below are the six steps on how to laser cut and engrave extruded cork.
- Prepare the laser cutter. Ensure that the laser cutter is calibrated and set up correctly for cutting and engraving extruded cork. Adjust the laser’s focus to the appropriate height for the cork material’s thickness.
- Get the design ready. The design for the cut and engraving must be created or imported. Software like CorelDRAW or Adobe Illustrator is able to be used for this. Ensure that the design is placed and scaled appropriately for the cork material.
- Set the laser cutting and engraving parameters. Either in the software or on the laser cutter itself, set the laser cutting and engraving parameters. This pertains to the settings for power, speed, frequency, and other factors. Get the desired results by beginning with low power and speed settings and progressively increasing them.
- Place the extruded cork on the laser bed. Extruded cork must be placed on the laser bed. Attach the extruded cork to the laser bed to prevent it from sliding during cutting and engraving.
- Start the laser cutting and engraving. Launch the laser cutter, and carry out the cut and engraving in accordance with the specifications provided in Step 3. Keep an eye on how the cutting and engraving are coming along and change the parameters as necessary.
- Remove the cut and engraved cork. The cork must be taken out of the laser bed after it has been sliced and engraved with a laser. It allows one to clean the cork of any leftover dirt.
How to Laser Cut and Engrave Cast Cork?
Listed below are the six steps on how to laser cut and engrave cast cork.
- Configure the laser cutter. Ensure that the laser cutter is calibrated and set up correctly for cutting and engraving cast cork. Adjust the laser’s focus to the appropriate height for the cork’s thickness.
- Prepare the layout. Make or import the cut and engraving design. It is possible with programs like Adobe Illustrator and CorelDRAW. Ensure that the design is scaled and positioned appropriately for the cork material.
- Customize the laser cutting and engraving settings. Configure the laser cutting and engraving parameters in the software or directly on the laser cutter. It contains power, speed, and frequency options, among others. Start with low power and speed settings and progressively raise them to attain the desired results.
- Cast the cork and place it on the laser bed. Cast the cork and place it on the laser bed: Attach the cast cork to the laser bed to prevent it from shifting during the engraving and cutting processes.
- Start the laser cutting and engraving. Launch the laser cutter and do the cut and engraving based on the settings established in step 3. Observe the progress of the cut and engraving, and modify the parameters as necessary.
- Remove the cut and engraved cork. The cork must be pulled out of the laser bed after it has been cut and engraved with a laser. It enables one to clean the cork of any remaining dirt.
What are the differences between General Part and Presentation Part Cutting for Cork?
“General Part” and “Presentation Part” cutting are two distinct cutting techniques used for various reasons when discussing laser cutting cork. General Part Cutting is a technique used for cutting greater sections of cork material with fewer details. The laser is programmed to continuously cut through the cork material, producing a smooth and uniform cut. This technique of cork cutting is effective and is able to be used to produce huge amounts of cork pieces rapidly and precisely.
What speed is better for Cork with Presentation Parts?
The optimal speed range for laser engraving of cork presentation parts is about 20 mm/s for sheets up to 3 mm thick. Do a test cut on a tiny piece of cork to see whether laser cutting must be done on cork that is a different thickness. This allows for determining the best laser power and speed for the real workpiece.
On the other hand, Presentation Part Cutting is a procedure used to cut smaller, more complex parts of cork material, such as logos, lettering, and elaborate patterns. The laser is programmed to use a series of brief pulses to cut through the cork material, resulting in a more accurate and detailed cut. This procedure is often employed to create personalized, high-quality cork products since it is slower than conventional component cutting.
The amount of detail and accuracy of the cut is the primary distinction between general part cutting and presentation part cutting. General part cutting is used to rapidly and effectively cut bigger portions of cork material, whereas presentation part cutting is used to create elaborate patterns on cork items.
What power is better for Cork with General Parts?
Cork is able to be laser-engraved at relatively low power levels because of its excellent contrast qualities. 40-50 Watts must be plenty for a typical CO2 laser cutter. Changing the laser strength is able to alter the color of the laser engraving lines. They are able to become darker or brighter, which provides interesting effects in certain circumstances.
How does Cork Sheet Thickness affect laser cutter watt need?
Laser-cutting cork requires more power if the sheet is thicker. It is because the laser beam has to penetrate more material in the case of thicker plates. The laser beam gets weaker since a part of it is absorbed by the material. Thus, the larger the thickness, the more laser power is needed to start with. The aesthetics must not be affected, though.
One must not use excessive laser power to cut cork because it is able to severely burn the cutting edges. This restriction makes cutting or engraving an extremely thick cork more time-consuming.
What is the best setting for Laser Cutting Cork?
The best settings for laser cork cutting are 40-50 Watts of power and a velocity of about 20 mm/s. This holds for cork up to 3 mm thickness. The power must be somewhat greater for bigger thicknesses. These settings are sufficient because cork has very favorable contrast and laser beam-absorbing properties.
What are the common mistakes for Laser Cutting Cork?
Listed below are the common mistakes for laser cutting cork.
- Incorrect laser settings: Laser cutting cork requires the use of certain laser settings to obtain the required cut. Incorrect settings result in uneven cuts, charring, or even a fire.
- Not cleaning the cork before cutting: Cork is able to include dust, dirt, or other pollutants that interfere with the laser cutting process if it is not cleaned before cutting. It is essential to clean the cork before cutting it for optimal results.
- Overlapping cuts: Cutting that overlaps result in overburning, charring, and uneven cuts. It is essential to ensure that each cut is appropriately spaced to prevent these complications.
- Ignoring cork thickness: The thickness of the cork material is able to have a significant impact on the laser cutting process. The laser may be unable to cut through dense materials cleanly. The material may bend or get damaged during the cutting process if it is too thin.
- Failure to secure the cork properly: Cork is a lightweight material that is able to easily shift or slide during the laser cutting process. Inadequately fastened material results in incorrect cuts or possibly laser cutter damage.
What are the beginner tips for Laser Engraving Cork Sheets?
Here are some handy tips for beginners on how to engrave cork plates properly:
- Make sure that the input files for the laser system are correct.
- Use a large enough font and thick enough lines.
- Use a proper resolution for your files (at least 400 dpi).
- Focus the laser on the workpiece.
- Turn on the airflow.
- Start with the cork test sheet before starting the actual engraving.
- Select optimal settings as determined in step 6.
- Start engraving!
What is the advantage of cork laser cutting?
Cork laser cutting offers the benefit of being very fast and precise. Cork has good contrast behavior when it comes to laser light absorption. Thus, not much laser power is needed and the cork is able to be cut pretty fast. About 40 – 50 Watts of laser power and a speed of 20 mm/s normally yield good results for cork plates up to 3 mm.
Which Laser Cutter is best for Cork?
The best laser cutter for cork is a CO2 laser system, such as the LS series from Boss Laser. The best types from this series are the LS-1416 and the LS-1630, respectively. For larger cork sheets or industrial-sized batches, one can also use the HP series from Boss Laser. CO2 lasers are best suited because cork absorbs the infrared wavelengths from these lasers best. Hence, the cutting process is very fast, clean, and accurate. Moreover, there are several laser cutter types that are able to be used for cutting cork, including CO2 laser cutters, fiber laser cutters, Nd:YAG, and diode laser cutters.
What are the Cork Projects for Laser Cutting?
There are many exciting projects to be found on the web that uses a laser as a cork-cutting tool. Here are some awesome ones:
- Making a dartboard out of cork: https://www.youtube.com/watch?v=8C2KGknfRng
- Cork coasters with a bee logo: https://www.youtube.com/watch?v=p_FO89Vpl00
- Cork coasters with an integrated drinking game: https://www.youtube.com/watch?v=JRpZYfqR16Y
- Laser engraved cork ornaments: https://www.youtube.com/watch?v=Dfxta53oa3Q
- Colored cork logos: https://www.youtube.com/watch?v=DZcyOX3MHBc
- Laser engraved cork slip mat for vinyl records: https://www.youtube.com/watch?v=K5lrDP04qLw
- Cork tiles with a personal logo: https://www.youtube.com/watch?v=prEf_q9c8eo
- Laser cut cork tote bag: https://www.youtube.com/watch?v=ztaFDxtnmlE
- Laser cut world map made of cork: https://www.youtube.com/watch?v=fcRKv_5v4f8
- Laser cutting 18’’ cork parts: https://www.youtube.com/watch?v=_GyGRzqsLms
What are the alternatives of Cork for Laser Cutting?
Listed below are the alternatives of cork for laser cutting.
- Acrylic: It is a popular alternative for cork owing to its flexibility and laser-cutting simplicity. It is available in a wide range of colors and finishes, and it is able to be carved into complicated forms with crisp edges. Acrylic engraving is a popular medium for laser engraving because of its transparency, adaptability, and durability. It’s crucial to utilize the proper laser settings when engraving acrylic in order to get the depth and clarity one wants. Signage, trophies, and other uses for engraving include creating an etched or frosted impression on the acrylic’s surface.
- Wood: It is a natural material that is able to be laser cut into a wide range of forms and sizes. It has a distinct texture and may be stained or painted to produce a variety of textures. Wood engraving is a natural medium that is able to produce a variety of effects on wood. The surface of the wood is able to be polished by engraving, or the material is able to be removed to provide relief or a 3D look. It’s crucial to choose the appropriate laser settings for the particular kind of wood being utilized since various types of wood are going to provide different results. A lot of customized presents, signage, and home décor items are made with wood engraving.
- Leather: It is a long-lasting and flexible material that is able to be laser cut into elaborate patterns. It’s often utilized in fashion and accessory design, as well as customized presents and home décor. Leather engraving is able to make detailed designs and text on leather. Fashion, accessories, and other uses for engraving include creating a burnt or embossed appearance on the leather’s surface. Use the proper laser settings to prevent overburning or harming the leather.
- Foam: Foam materials such as EVA foam or foam rubber are able to be readily laser cut into intricate designs for cosplay costumes, props, and other purposes. It is a lightweight, flexible material that may be painted or covered with fabric to provide a variety of finishes. Intricate patterns and forms are able to be readily created using foam engraving on foam materials like EVA foam or foam rubber. Cosplay costumes, props, and other uses are able to benefit from engraving since it is able to provide a burnt or etched appearance on the foam’s surface. It is critical to utilize the proper laser settings to prevent overburning or foam damage.
- Paper: A versatile material, the paper is able to be laser cut into elaborate patterns for use in stationery, packaging, and other uses. It is available in a number of weights and textures, and it is readily customizable with pictures or text. Intricate design and patterns are able to make in paper engraving. The surface of the paper is able to be polished by engraving, or the material is being removed to provide relief or a 3D look. Fine art, stationery, and other paper items are often produced using paper engraving.